Skip to Main Content
Free Shipping Over $15030-Day Returns
800-288-0640
Free Shipping $150+30-Day Returns800-288-0640
Factory Workshop SpecificationsPlatform Gen: 20142020

2020 BMW S 1000 R Specifications & Consumables

Official workshop technical reference: fluid capacities, spark plug codes, drive chain specs, and tire inflation pressures.

Gen 20142020

Factory Platform Compatibility: All workshop fluid capacities, maintenance milestones, torque specifications, and consumables on this specification sheet are factory-identical across model years 2014 through 2020.

Select Model Year:(Active: 2020)
Engine
999cc
Drive
525
Cooling
Liquid/Oil-Cooled

Engineering Subsystem Workbenches & Calculators

Dedicated deep-dive diagnostic tools, torque matrices, wiring pinouts, and calculators tailored for 2020 BMW S 1000 R.

10 Dedicated Engineering Spoke Pages
Fluids & Service Capacities
Shop Fluids →
Engine Oil (Drain & Filter Change)3.50 L (3.70 US qt)
Engine Oil (Drain Only)3.00 L (3.17 US qt)
Recommended Oil Viscosity5W-40 API SL / JASO MA2
Coolant System Capacity2.90 L (3.06 US qt)
Brake Fluid StandardDOT 4
Drivetrain, Chain & Gearing
Shop Chains & Sprockets →
Drive Chain Pitch525
Chain Link CountN/A
Front Sprocket TeethN/A
Rear Sprocket TeethN/A
Final Drive Configuration525 Pitch Chain
Ignition & Electrical Specifications
Shop Plugs & Batteries →
OEM Spark Plug Part NumberNGK LMAR9D-J
Electrode Spark Plug Gap0.8 mm (0.031 in)
OEM Battery Reference CodeYTX9-BS
Battery Output & Rating12V 8Ah 135 CCA
Spark Plug Inspection Interval18,000 miles (30,000 km)
Wheels, Tires & Inflation Pressures
Shop Tires →
Front Tire Dimensions120/70ZR17
Cold Front Inflation Pressure36 PSI (Cold)
Rear Tire Dimensions190/55ZR17
Cold Rear Inflation Pressure42 PSI (Cold)
OEM Wheel Rim Widths (F / R)3.50" / 6.00"

Critical Fastener Torque Tolerances

FSM Certified Specs
Factory workshop tightening torque ratings for axles, calipers, engine plugs, and triple clamps.
Lube:
Fastener / ComponentTorque (N·m)Service Note & Thread GuidanceSystem
Engine Oil Drain Bolt
M16 × 1.58 mm Allen / Hex Key
28 N·m
(20.7 ft-lb)
Hand-spin until washer seats flush against sump; torque in single continuous stroke.
WARNING: Over-torquing strips soft aluminum oil pans requiring permanent Heli-Coil or Time-Sert insert repair.
Engine / Drive
Engine Oil Filter (Spin-on / Cover)
M20 × 1.565 mm / 68 mm Filter CupEngine Oil (Pre-Lube)
11 N·m
(8.1 ft-lb)
Lubricate rubber O-ring with fresh clean engine oil before spinning on. Tighten until gasket contacts, then advance 2 to 2.5 full turns.
WARNING: Never install dry rubber seal. Dry gaskets pinch, buckle, and spray oil onto the rear tire at highway speed.
Engine / Drive
Spark Plugs (Cold Engine)
M10 × 1.016 mm (5/8 in) Thin-Wall Magnetic SocketNone (Clean Dry Plated Threads)
13 N·m
(9.6 ft-lb)
Hand-thread all plugs using rubber hose extension until seated. Torque strictly on cold engine (≤ 35°C / 95°F).
WARNING: Modern NGK/Denso trivalent plated threads require zero anti-seize. Torquing hot heads strips aluminum spark plug threads.
Engine / Drive
Clutch Pressure Plate Spring Bolts
M6 × 1.010 mm Socket / 8 mm Hex
10 N·m
(7.4 ft-lb)
Criss-cross diagonal pattern across 3 stages (finger tight → 5 N·m → 10 N·m) to seat pressure plate completely flat.
WARNING: Uneven tightening tilts the clutch pressure plate, snapping delicate aluminum clutch basket lifter posts.
Engine / Drive
Clutch Outer Case Cover Bolts
M6 × 1.08 mm Hex Socket
10 N·m
(7.4 ft-lb)
Criss-cross pattern starting from center bolts moving outward. Verify dowel alignment pins seat fully.
WARNING: M6 bolts into aluminum engine cases snap easily. Always use a precision low-range 1/4" drive torque wrench.
Engine / Drive
Alternator / Stator Cover Bolts
M6 × 1.08 mm Hex SocketMedium Strength (Blue 242/243) on Stator Wire Bracket
10 N·m
(7.4 ft-lb)
Criss-cross pattern. Apply thin bead of ThreeBond / RTV sealant only at rubber grommet wire passthrough.
WARNING: Powerful magnetic rotor will violently snap the cover against the engine case during installation; keep fingers clear.
Engine / Drive
Countershaft Front Sprocket Nut
M20 × 1.532 mm SocketMedium Strength (Blue 242/243) + Bend Lock Washer
85 N·m
(62.7 ft-lb)
Have assistant hold rear foot brake firmly. Torque nut to spec, then fold lock washer ear flat against hex flat.
WARNING: A loose countershaft nut will machine through the engine crankcase or lock the transmission at highway speed.
Engine / Drive
Rear Drive Sprocket Stud Nuts
M10 × 1.25 Self-Locking14 mm / 17 mm SocketMedium Strength (Blue 242/243) / OEM Metal Locknuts
80 N·m
(59 ft-lb)
Criss-cross star pattern in 2 stages to ensure rear sprocket sits 100% flush against the cush drive hub flange.
WARNING: Loose rear sprocket nuts will cock sideways, gouging the aluminum swingarm and throwing the drive chain.
Engine / Drive
Front Wheel Axle Spindle / Bolt
M20 × 1.517 mm AllenNone (Clean Dry Threads / Light Grease on Shaft)
50 N·m
(36.9 ft-lb)
Torque axle bolt first while pinch bolts remain loose. Pump front forks 3–4 times before torquing pinch bolts.
WARNING: Torquing pinch bolts before axle nut causes fork binding, stiction, and severe front brake shudder.
Chassis / Susp
Front Axle Fork Bottom Pinch Bolts
M8 × 1.256 mm Allen / 12 mm Socket
19 N·m
(14 ft-lb)
Dual pinch forks: alternate tightening between inner and outer bolt 3 times until wrench clicks on both without moving.
WARNING: Tightening one bolt relaxes the adjacent bolt. Failure to alternate causes pinch bolts to work loose under road vibration.
Chassis / Susp
Rear Axle Castle / Flange Nut
M24 × 1.532 mm SocketNone (Factory Locknut / Cotter Pin)
150 N·m
(110.6 ft-lb)
Push wheel forward against adjusters while torquing. Insert fresh cotter pin or R-clip through castle slot.
WARNING: Under-torquing allows axle cocking, throwing wheel out of alignment; over-torquing crushes wheel bearing spacer tubes.
Chassis / Susp
Rear Shock Upper & Lower Mount Bolts
M10 × 1.2514 mm / 17 mm SocketMedium Strength (Blue 242/243)
44 N·m
(32.5 ft-lb)
Torque bolts with rear suspension loaded at static ride height (wheel on ground), not at full hanging droop.
WARNING: Torquing shock eyelet rubber/spherical bushings at full droop locks preload twist into bushings, causing premature bushing tear.
Chassis / Susp
Swingarm Pivot Shaft Nut
M18 × 1.522 mm / 27 mm Socket
100 N·m
(73.8 ft-lb)
Set swingarm pivot thrust collar clearance with spanner tool before torquing central through-shaft nut.
WARNING: Incorrect pivot preload crushes needle bearings or induces lateral swingarm wobble and high-speed tank-slappers.
Chassis / Susp
Upper Triple Clamp (Fork Bridge) Pinch Bolts
M8 × 1.256 mm Allen / 12 mm Socket
26 N·m
(19.2 ft-lb)
Verify fork tube height / stanchion protrusion above top bridge matches factory spec with vernier caliper before tightening.
WARNING: Uneven fork tube heights alter chassis steering geometry, trail, and induce high-speed head-shake.
Controls
Lower Triple Clamp Pinch Bolts
M8 × 1.256 mm Allen / 12 mm Socket
23 N·m
(17 ft-lb)
Alternate between upper and lower bolt on each side 3 times to achieve uniform clamping without localized tube deformation.
WARNING: CRITICAL: Overtightening lower clamp pinches the outer fork slider oval, locking fork bushings and causing severe suspension stiction.
Controls
Handlebar Riser Clamps / Clip-on Clamps
M8 × 1.256 mm Allen Socket
24 N·m
(17.7 ft-lb)
MANDATORY ZERO-GAP RULE: Tighten front bolts until clamp casting touches bottom casting with zero gap; then torque rear bolts to spec.
WARNING: Leaving a gap at the front bolts allows handlebars to slip under sudden hard emergency braking.
Controls
Steering Stem Head Nut
M28 × 1.030 mm / 36 mm Socket
110 N·m
(81.1 ft-lb)
Ensure upper triple clamp pinch bolts are loose when torquing stem nut to prevent binding the steering bearings.
WARNING: This nut clamps the top bridge; steering head bearing preload is adjusted separately via the lower castle spanner ring.
Controls
Front Brake Master Cylinder Clamp Bolts
M6 × 1.08 mm Hex / 5 mm Allen
10 N·m
(7.4 ft-lb)
Align "UP" arrow mark on split clamp upward. Tighten upper bolt first until clamp seats flush; then torque lower bolt to 10 N·m.
WARNING: Tightening bottom bolt first pinches the reservoir casting unevenly, cracking master cylinder clamp ears.
Controls
Front Brake Caliper Mount Bolts
Radial M10 × 1.2512 mm / 14 mm Socket (T50 Torx on BMW)Medium Strength (Blue 242/243) / Factory Micro-Encapsulated
38 N·m
(28 ft-lb)
Radial calipers: tighten upper and lower bolts in two equal stages (20 N·m, then final spec).
WARNING: Radial caliper mounting threads tap directly into aluminum fork bottoms. Never use pneumatic/electric impact guns.
Braking
Rear Brake Caliper Mount / Bracket Bolts
M8 × 1.2512 mm Socket / 6 mm AllenMedium Strength (Blue 242/243)
23 N·m
(17 ft-lb)
Ensure caliper bracket sliding torque arm slot engages swingarm tab cleanly before tightening.
WARNING: Unengaged bracket tabs allow rear caliper to rotate with disc during braking, shearing brake lines.
Braking
Front Brake Disc Rotor Bolts
M8 × 1.25 Low-Profile Shoulder6 mm Allen / T40 TorxMedium Strength (Blue 242/243 Mandatory)
18 N·m
(13.3 ft-lb)
Clean wheel hub female threads with solvent; apply 2 drops of Blue 243. Tighten in criss-cross star pattern across 2 stages.
WARNING: A loose brake rotor bolt can back out and impact the front fork leg, instantly locking the front wheel.
Braking
Rear Brake Disc Rotor Bolts
M8 × 1.25 / M10 × 1.256 mm Allen / T40 TorxMedium Strength (Blue 242/243 Mandatory)
23 N·m
(17 ft-lb)
Criss-cross star pattern. Ensure disc sits 100% flat against wheel hub register with zero trapped debris.
WARNING: Trapped dirt under rotor mounting flange causes severe brake pedal pulsation and lateral rotor runout.
Braking
Hydraulic Brake Line Banjo Bolts
M10 × 1.25 (Brembo: M10 × 1.0)12 mm / 14 mm Hex SocketNone (Clean Dry with Fresh Copper Washers)
30 N·m
(22.1 ft-lb)
Always replace the two copper/aluminum crush washers per banjo joint. Never reuse crushed washers.
WARNING: Over-torquing shears the cross-drilled fluid passage inside the banjo bolt, destroying the caliper casting.
Braking
Caliper Hydraulic Bleed Screws
M7 × 1.0 / M8 × 1.258 mm / 10 mm Line Wrench
6 N·m
(4.4 ft-lb)
Use 6-point flare-nut / line wrench to prevent rounding soft hex. Snug firmly until seated against conical seat.
WARNING: Overtightening distorts the internal conical sealing point, causing persistent hydraulic fluid weeping.
Braking
Technical Standard:Always calibrate torque wrenches prior to critical chassis fastening. Values reflect clean, dry threads unless threadlocker or anti-seize is specifically noted.

Tire Engineering & Multi-Scenario Pressure Matrix

ETRTO Validated
Inflation targets calibrated across operating modes, verified rim width ranges, and certified alternate sizes.
Shop Direct-Fit Tires
Multi-Scenario Inflation Pressures
Solo Street / CommutingCold Baseline
Front: 36 PSI
Rear: 42 PSI
Two-Up Passenger & LuggageMax Load
Front: 38 PSI
Rear: 42 PSI
Trackday / Closed CourseTrack Calibrated
Front: 31 Cold / 34 Hot
Rear: 26 Cold / 29 Hot
Rim Geometry & ETRTO Envelopes
Front Wheel
OEM Rim Width:3.50"
Permissible Envelope:3.50" - 3.75"
Rear Wheel
OEM Rim Width:6.00"
Permissible Envelope:6.00" - 6.25"
Operating outside ETRTO envelope width alters crown radius, accelerates shoulder wear, and impacts lean stability.
Factory Dimensions & Verified Alternates
Factory Standard Sizes
Front:120/70ZR17
Rear:190/55ZR17
Verified Alternate Fitments
190/55ZR17
200/55ZR17
Alternate profiles verified for swingarm, chain guard, and fender clearances.

Final Drive Gearing & Speed/RPM Calculator

Chain Drive
Factory reduction ratios, interactive sprocket gearing simulator, 6th gear cruising RPM matrix, and swingarm chain adjustment tolerances.
Shop Chains & Sprockets
Factory Pitch / Size
525 Pitch
OEM Sprockets
17T Front / 45T Rear
Factory Final Ratio
2.647 : 1
Factory Link Count
120 Links (Rivet)
Tensile Rating
9,500 lbs
Quick Gearing Presets
Front Countershaft SprocketStock: 17T
17 Teeth
Factory teeth count
Rear Driven SprocketStock: 45T
45 Teeth
Factory teeth count
Drive Ratio & Torque Impact
Calculated Final RatioStock: 2.647
2.647 : 1+0.00%
Drivetrain Torque Delta
+0.0% Rear Wheel Torque Increase
Quicker throttle roll-on response and aggressive low-to-mid range launch. Reduces top speed in each gear proportionally.
Countershaft Speedo Variance:-0.0%
At 70.0 mph indicated speed, true vehicle ground speed is 70.0 mph. Speedo calibrator module recommended.
Cruising Engine RPM in 6th Gear
60 MPH
Stock: 3,227 RPM
3,227 RPM
70 MPH
Stock: 3,764 RPM
3,764 RPM
80 MPH
Stock: 4,302 RPM
4,302 RPM
Calculated using factory 6th gear ratio (0.923), primary reduction (1.652), and 190/55ZR17 rolling circumference.
Chain Sizing & Swingarm Slack
Recommended Drive Chain Length:120 Links
Fits within factory swingarm axle slot adjustment range (35 - 45 mm (1.4 - 1.8 in) on side stand). Retain stock 120 links.
Factory Swingarm Slack Tolerance
35 - 45 mm (1.4 - 1.8 in) on side stand
Measure slack at midpoint between countershaft and rear axle on the bottom strand with the motorcycle on its side stand unladen.
Master Link Requirement:Rivet link (ZJ) mandatory for > 400cc
Recommended Hardware: D.I.D 525 VX3 Pro-Street X-Ring Chain (120 Links)Sunstar Steel Countershaft (17T) & Rear Sprocket (45T)
Factory Chassis Geometry

Chassis Alignment, Drive Tension & Rear Axle Calibration

Precision workshop alignment tools, dynamic drive tension tolerances, and axle spindle calibration for the 2020 BMW S 1000 R.

Factory Swingarm Slack Tolerance
35 - 45 mm (1.4 - 1.8 in) on side stand
Test Condition: Measure midway on lower chain run with bike on side stand (unweighted).
Measured Chain Slack
40 mm
10mm (Too Tight)Factory Window: 35 - 45 mm65mm (Critical Slack)
PASS: IN FACTORY SPEC(40 mm / 1.57 in)

FACTORY TOLERANCE CERTIFIED: Chain tension is in optimal balance. Allows complete swingarm articulation through the entire suspension stroke without countershaft binding or excessive snatch on deceleration.

Precision Alignment

Rear Axle Caliper Alignment

Why mechanics never trust swingarm stamped notches: Factory stamping tolerances can be off by up to 3mm, causing the rear tire to "dog-track" and chew through tire shoulders.

LEFT PIVOT TO AXLE:
215.0 mm
RIGHT PIVOT TO AXLE:
215.0 mm
PERFECT WHEEL ALIGNMENT (PASS)Δ 0.0 mm
Rear axle is square to the swingarm pivot within 0.5mm. Sprocket and chain tracking run in direct true plane.
Wear Limit Diagnostic

21-Pin (20-Pitch) Chain Stretch Test

Pull chain tight and measure distance across 21 consecutive pins with a vernier caliper. Standard new length = 317.5 mm; factory discard limit = 323.0 mm (1.5% stretch).

MEASURED 21-PIN DISTANCE:
317.5 mm
Stretch: +0.0 mm (0.0%)
Remaining Chain Pin/Bushing Life:100% (GOOD)
Three Professional Workshop Alignment Techniques
Method 1 — Swingarm Pivot to Axle Center (The Gold Standard):

Insert a precision rod or vernier caliper measuring from the center dimple of the swingarm pivot bolt to the center dimple of the rear axle on both left and right sides. Both sides must match within 0.5 mm. This mechanically guarantees that the rear axle is perfectly perpendicular to the motorcycle chassis centerline regardless of factory swingarm stamping defects.

Six-Step Workshop Chain Adjustment Protocol
Rear Axle Nut: 150 N·mAdjuster Locknut: 16 - 22 N·m
1Loosen Axle Spindle Nut
Loosen the rear axle nut 1 to 2 full turns (150 N·m). Keep it snug enough so the wheel does not cock sideways freely.
2Back Off Adjuster Locknuts
Back off the jam locknuts on both the left and right adjuster bolts by 2 to 3 turns using a 12mm or 14mm box wrench.
3Turn Adjusters in Small Increments
Turn both adjuster bolts equally. One full 360° turn of an M8 bolt moves the axle by 1.25 mm. Adjust 1/4-turn at a time.
4Kick Tire Firmly Forward
Kick the rear tire firmly toward the front of the motorcycle to ensure the axle blocks are solidly seated against the bolt heads.
5Torque Rear Axle Nut to Spec
Torque the axle spindle nut to exactly 150 N·m. Always use a calibrated 1/2" torque wrench.
6Crucial Re-Check of Slack
Torquing down the rear axle nut frequently tightens chain slack by 2 to 4 mm! Always re-check slack after full torque is applied.

Factory Valve Clearance & Shim Calculator

OEM Workshop Tolerances
Cylinder head valve lash specifications, timing TDC mark alignments, and interactive replacement shim calculation engine.
Adjustment Mechanism: 9.48 mm
Active Valve Range (INTAKE)
0.12 - 0.20 mm
0.005 - 0.008 in
Nominal Mid-Spec Target
0.16 mm
Ideal cold lash assembly setting
Shim Diameter / Tappet
9.48 mm
Bucket-and-shim interface
Measurement Condition
Cold Engine (≤ 35°C / 95°F)
TDC compression stroke only
Interactive Shim Sizing Calculation Engine: New Shim = Current Shim + (Measured Clearance - Target Clearance)
mm
Factory intake tolerance: 0.12 - 0.20 mm
mm
Measured with micrometer or read laser-etched face
TDC Crankshaft Timing Index
Align crankshaft TDC mark with engine timing index pointer
Feeler Gauge Technique
Angled blade feeler gauge (cold engine ≤ 35°C / 95°F)

Cylinder Compression & Leakdown Diagnostic Engine

Multi-Cylinder Dry vs. Wet Test Bench, Differential Pressure Regulator & Acoustic Stethoscope Locator
Ratio: 13.1:1Std: 175-225 PSILimit: 150 PSIWhip Adapter: M10 x 1.0
Diagnostic Presets:
Cyl #1 (Left)IN-SPEC
050100150200250
208PSI(1434 kPa)
Cyl #2IN-SPEC
050100150200250
206PSI(1420 kPa)
Cyl #3IN-SPEC
050100150200250
204PSI(1407 kPa)
Cyl #4 (Right)IN-SPEC
050100150200250
202PSI(1393 kPa)
Cross-Cylinder Variance: Δ 6 PSI (OEM Limit: ≤ 14 PSI)
VARIANCE IN-SPEC
All cylinders demonstrate strong, balanced mechanical sealing. Piston ring packs, cylinder cross-hatch, and valve seats are within factory specification.
Official Workshop Manual Compression Test Protocol
Step 0 of 5 Completed
Step 1: Engine Operating Temperature
Run engine until coolant reaches 60°C - 80°C (140°F - 176°F). Cylinder expansion brings rings and pistons to true operating clearances.
Step 2: Spark Plug Removal & Port Clean
Blow compressed air around spark plug wells to eject grit, then remove all spark plugs. Thread in M10 x 1.0 whip adapter hand-tight with fresh O-ring.
Step 3: Wide-Open Throttle (WOT) Lock
Hold throttle grip fully wide open (or lock throttle bodies open) to eliminate intake butterfly vacuum restriction and ensure 100% volumetric cylinder filling.
Step 4: Battery Tender Voltage Stabilization
Connect a 12V shop battery tender or booster. Starter must sustain uninterrupted cranking speed (350 RPM) to build maximum dynamic stroke pressure.
Step 5: Crank 4-6 Compression Strokes
Engage starter until gauge needle ceases rising (typically 4 to 6 strokes). Record maximum peak pressure and compare against the OEM limits above.
Factory Liquid Cooling Hydraulics

Engine Cooling System Hydraulics, Thermostat & Antifreeze Calibration

Fluid capacity, silicate-free chemistry, thermostat opening bench tolerances, and radiator cap relief pressure for the 2020 BMW S 1000 R.

Factory Hydraulic Capacities & Pressurization
Total Cooling Capacity
2.9 L
Radiator + Jacket + Reservoir
Radiator & Engine Jacket
2.45 L
Circulating loop volume
Expansion Reservoir
0.45 L
Cold fill to MIN line
Radiator Cap Relief Spec
1.4 bar
140 kPa valve release
OEM Chemical Mandate: 100% Silicate-Free Ethylene Glycol (OAT)
Recommended: Silicate-Free Ethylene Glycol 50/50 (Nitrite/Phosphate Free Aluminum Safe). Traditional automotive green coolants contain silicates that precipitate as microscopic sand crystals, scouring and destroying motorcycle ceramic water pump mechanical seals within 5,000 miles. Always dilute with pure distilled water; tap water minerals bond to hot aluminum cylinder liners and cause localized boiling hot spots.
Interactive Antifreeze Concentration & Protection Engine
Concentration: 50% Concentrate / 50% Distilled Water
Freeze Point Protection
-37°C
Coolant remains slush-free without expanding or cracking aluminum cylinder water jackets.
Boiling Point (Under 1.4 bar Cap)
128°C
Pressurized protection prevents localized steam pockets and head gasket blowout.
Workshop Batch Mixing Recipe
Concentrate: 1.45 L
Distilled Water: 1.45 L
Pre-mix together in clean container before pouring into radiator filler neck.
Thermostat Stove-Top Bench Testing Simulator
Water Bath Temperature: 25°C (77°F)
Thermostat Valve Lift Height0.0 mm / 8.5 mm Min
VALVE SEALED COLD (25°C / 77°F) — NORMAL WARM-UP
Workshop Bench Technique: Suspend thermostat on a wire suspended in a beaker of water with a digital thermometer. Do NOT let thermostat touch the metal bottom of the pan. Heat slowly; valve must crack at 82°C and open at least 8.5 mm by 96°C. If it opens late or fails to reach 8.5 mm, replace thermostat immediately.
Radiator Cap Pressure Tester Diagnostic
Holding Spec: 1.4 bar (20.3 psi)
Motorcycle radiator caps feature a calibrated spring that holds hydraulic pressure inside the radiator. Every 1 psi of pressure elevates the coolant boiling point by 3°F.
Symptom: Mystery Boil-Over at Traffic Stops
If a bike runs cool at 60 MPH but immediately burps coolant into the reservoir and overflows onto the ground at stoplights, test the cap with a Stant pressure tester. An aged cap venting early at 0.7 bar (10 psi) lets coolant flash into steam at 115°C instead of 128°C.
Five-Step Workshop Air-Burp Protocol
Drain Plug: 10 N·m
1
Drain & New Washer
Remove water pump drain bolt and cylinder jacket drain. Replace copper/aluminum crush washer; torque to 10 N·m.
2
Slow Gravity Fill
Pour pre-mixed coolant slowly into radiator filler neck so air bubbles have time to vent upward.
3
Hose Kneading
Firmly squeeze upper and lower radiator hoses by hand to dislodge air bubbles trapped in the water pump impeller and cylinder head.
4
Thermostat Cycle
Idle engine with radiator cap off. Wait for thermostat to crack open at 82°C. Level will burp and drop; immediately top off.
5
Reservoir Cold Fill
Fill expansion reservoir between MIN and MAX marks. Install pressure cap past first safety detent to full lock.
FSM Induction CalibrationInline-4 (4 Throttle Bores)

Fuel Delivery, Throttle Body Synchronization & Manometer Balancer

Factory intake depression specifications (230 mmHg), electronic fuel pump pressure testing (58 PSI), injector resistance, and interactive multi-column manometer balancing.

Warm Idle: 1,150 - 1,250 RPM
Quick Workshop Diagnostic Presets
Simulate Throttle Linkage Asymmetry, Hunting Idle, or Intake Boot Vacuum Leaks
OPTIMAL SYNCHRONIZATION: BALANCED (Δ ≤ 10 mmHg)
Diagnostics:Max Differential: Δ 0 mmHg (Factory Max Tolerance: ≤ 10 mmHg)
All 4 throttle plates pull uniform intake depression within factory engineering tolerance (≤ 10 mmHg / 1.33 kPa). Delivers immediate linear throttle pickup, silky smooth idle, uniform cylinder torque pulses, and balanced exhaust temperatures.

Workshop Multi-Column Fluid Manometer

Damped intake depression columns. Target spec: 230 mmHg (±10 mmHg) at warm idle (1,150 - 1,250 RPM).
Reference: Cylinder #1 (Master)
Mechanism: Bypass Screws
CYL #1
MASTER REF
230mmHg
30.7 kPa · 9.1 inHg
±0 mmHg (Exact Target)
Fixed Reference Master. Synchronize all slave throttle bodies to match this column.
CYL #2
SLAVE BORE
230mmHg
30.7 kPa · 9.1 inHg
±0 mmHg (Exact Target)
CYL #3
SLAVE BORE
230mmHg
30.7 kPa · 9.1 inHg
±0 mmHg (Exact Target)
CYL #4
SLAVE BORE
230mmHg
30.7 kPa · 9.1 inHg
±0 mmHg (Exact Target)
Vacuum Take-Off Ports: Intake port sampling points sealed with M5 brass screws
Damping Protocol: Restrictor valves must be adjusted until columns oscillate no more than ±5 mmHg per intake stroke.

Fuel Pump Pressure & 5-Min Hold Test

EFI Pressure Rail
Running Fuel Pressure
58 PSI(4.00 bar)
OEM Running Spec
58 PSI (±3 PSI)
PASS: WITHIN OEM RUNNING SPEC
Fuel pump delivery pressure is 58 PSI (Factory spec: 58 PSI ± 3 PSI / 4 bar). High-pressure regulator and pump rotor operating within factory design threshold.
Connect mechanical gauge to the quick-disconnect fuel rail fitting using an OEM banjo or T-adapter.

Fuel Injector Resistance & Induction Specs

Multimeter Bench Check
OEM Injector Solenoid Resistance
11.8 - 12.4 Ω at 20°C
Measure across injector 2-pin harness socket with ignition OFF. Internal coil resistance increases by ~0.4% per °C rise above 20°C (68°F). Replace injector if resistance reads open (> 100 kΩ) or shorted (< 2 Ω).
Bore Diameter
48 mm
Operating Temp
80°C (176°F)
Induction Type
BMS-MP Electronic Throttle with ShiftCam Variable Valve Timing
Injector O-rings must be lubricated with a light coat of clean engine oil before seating into fuel rail.

4-Step Throttle Body Synchronization Protocol

Official workshop manual step-by-step checklist. Mark each step as you complete it on the workbench.
0 of 4 Steps Complete
1CLICK TO MARK DONE
Engine Pre-Flight Conditioning
Check and adjust valve clearances to spec before attempting sync. Ensure air filter is clean, spark plugs are fresh, and engine is fully warmed to operating temperature (80°C–90°C).
2CLICK TO MARK DONE
Manometer Connection & Damping
Connect 4-column liquid or digital manometer hoses to Intake port sampling points sealed with M5 brass screws. Adjust in-line hose restrictor valves to dampen rapid intake pulsation until fluid columns stabilize.
3CLICK TO MARK DONE
Balance Screw Calibration
With engine idling at 1,150 - 1,250 RPM, identify Cylinder #1 (Master). Adjust Full electronic throttle servo balance with BMW Motorrad Diagnostic System (ISTA) until all cylinder columns are within 10 mmHg (1.33 kPa) of the master reference.
4CLICK TO MARK DONE
Throttle Blip & Locknut Verification
Blip throttle to 3,000 RPM 2–3 times and verify columns return evenly to idle balance. Tighten any balance screw locknuts securely, re-install rubber vacuum sealing caps, and verify idle speed.
Shop Carb & Throttle Body CleanersShop Multi-Column Manometers & Sync ToolsShop EFI Fuel Pressure Test Gauge Kits
Factory OEM Fastener Torque Matrix

Multi-System Fastener Torque Quick-Finder & Bolt Grade Matrix

Tightening torques, thread dimensions, socket drive sizes, threadlocker specifications, and sequential tightening procedures for the 2020 BMW S 1000 R.

Interactive Thread Lubrication & Torque Derating Calculator
Prevent Stripped Threads: Convert Dry Factory Torque Specs to Lubricated Wrench Settings
100% FACTORY DRY SPEC

Torque wrenches measure rotational friction, not axial bolt stretch. Applying dry factory torque specs to threads lubricated with anti-seize, threadlocker, or oil reduces thread friction, causing bolt tension to increase 30%–50% at the same wrench setting and stripping soft aluminum motorcycle castings. Select your active fastener thread condition below:

Dry Threads (Factory Baseline): Clean, dry threads with zero lubricant. 100% of factory torque spec.
Engine & DrivetrainNone (Clean Dry)

Engine Oil Drain Bolt

Tightening Torque
28 N·m
20.7 ft-lb
Thread Dimension
M16 × 1.5
Socket / Drive
8 mm Allen / Hex Key
Sequence: Hand-spin until washer seats flush against sump; torque in single continuous stroke.
CRITICAL CAUTION: Over-torquing strips soft aluminum oil pans requiring permanent Heli-Coil or Time-Sert insert repair.
Engine & DrivetrainEngine Oil (Pre-Lube)

Engine Oil Filter (Spin-on / Cover)

Tightening Torque
11 N·m
97 in-lb
Thread Dimension
M20 × 1.5
Socket / Drive
65 mm / 68 mm Filter Cup
Sequence: Lubricate rubber O-ring with fresh clean engine oil before spinning on. Tighten until gasket contacts, then advance 2 to 2.5 full turns.
CRITICAL CAUTION: Never install dry rubber seal. Dry gaskets pinch, buckle, and spray oil onto the rear tire at highway speed.
Engine & DrivetrainNone (Clean Dry Plated Threads)

Spark Plugs (Cold Engine)

Tightening Torque
13 N·m
115 in-lb
Thread Dimension
M10 × 1.0
Socket / Drive
16 mm (5/8 in) Thin-Wall Magnetic Socket
Sequence: Hand-thread all plugs using rubber hose extension until seated. Torque strictly on cold engine (≤ 35°C / 95°F).
CRITICAL CAUTION: Modern NGK/Denso trivalent plated threads require zero anti-seize. Torquing hot heads strips aluminum spark plug threads.
Engine & DrivetrainNone (Clean Dry)

Clutch Pressure Plate Spring Bolts

Tightening Torque
10 N·m
89 in-lb
Thread Dimension
M6 × 1.0
Socket / Drive
10 mm Socket / 8 mm Hex
Sequence: Criss-cross diagonal pattern across 3 stages (finger tight → 5 N·m → 10 N·m) to seat pressure plate completely flat.
CRITICAL CAUTION: Uneven tightening tilts the clutch pressure plate, snapping delicate aluminum clutch basket lifter posts.
Engine & DrivetrainNone (Clean Dry)

Clutch Outer Case Cover Bolts

Tightening Torque
10 N·m
89 in-lb
Thread Dimension
M6 × 1.0
Socket / Drive
8 mm Hex Socket
Sequence: Criss-cross pattern starting from center bolts moving outward. Verify dowel alignment pins seat fully.
CRITICAL CAUTION: M6 bolts into aluminum engine cases snap easily. Always use a precision low-range 1/4" drive torque wrench.
Engine & DrivetrainMedium Strength (Blue 242/243) on Stator Wire Bracket

Alternator / Stator Cover Bolts

Tightening Torque
10 N·m
89 in-lb
Thread Dimension
M6 × 1.0
Socket / Drive
8 mm Hex Socket
Sequence: Criss-cross pattern. Apply thin bead of ThreeBond / RTV sealant only at rubber grommet wire passthrough.
CRITICAL CAUTION: Powerful magnetic rotor will violently snap the cover against the engine case during installation; keep fingers clear.
Engine & DrivetrainMedium Strength (Blue 242/243) + Bend Lock Washer

Countershaft Front Sprocket Nut

Tightening Torque
85 N·m
62.7 ft-lb
Thread Dimension
M20 × 1.5
Socket / Drive
32 mm Socket
Sequence: Have assistant hold rear foot brake firmly. Torque nut to spec, then fold lock washer ear flat against hex flat.
CRITICAL CAUTION: A loose countershaft nut will machine through the engine crankcase or lock the transmission at highway speed.
Engine & DrivetrainMedium Strength (Blue 242/243) / OEM Metal Locknuts

Rear Drive Sprocket Stud Nuts

Tightening Torque
80 N·m
59 ft-lb
Thread Dimension
M10 × 1.25 Self-Locking
Socket / Drive
14 mm / 17 mm Socket
Sequence: Criss-cross star pattern in 2 stages to ensure rear sprocket sits 100% flush against the cush drive hub flange.
CRITICAL CAUTION: Loose rear sprocket nuts will cock sideways, gouging the aluminum swingarm and throwing the drive chain.
Chassis & SuspensionNone (Clean Dry Threads / Light Grease on Shaft)

Front Wheel Axle Spindle / Bolt

Tightening Torque
50 N·m
36.9 ft-lb
Thread Dimension
M20 × 1.5
Socket / Drive
17 mm Allen
Sequence: Torque axle bolt first while pinch bolts remain loose. Pump front forks 3–4 times before torquing pinch bolts.
CRITICAL CAUTION: Torquing pinch bolts before axle nut causes fork binding, stiction, and severe front brake shudder.
Chassis & SuspensionNone (Clean Dry)

Front Axle Fork Bottom Pinch Bolts

Tightening Torque
19 N·m
14 ft-lb
Thread Dimension
M8 × 1.25
Socket / Drive
6 mm Allen / 12 mm Socket
Sequence: Dual pinch forks: alternate tightening between inner and outer bolt 3 times until wrench clicks on both without moving.
CRITICAL CAUTION: Tightening one bolt relaxes the adjacent bolt. Failure to alternate causes pinch bolts to work loose under road vibration.
Chassis & SuspensionNone (Factory Locknut / Cotter Pin)

Rear Axle Castle / Flange Nut

Tightening Torque
150 N·m
110.6 ft-lb
Thread Dimension
M24 × 1.5
Socket / Drive
32 mm Socket
Sequence: Push wheel forward against adjusters while torquing. Insert fresh cotter pin or R-clip through castle slot.
CRITICAL CAUTION: Under-torquing allows axle cocking, throwing wheel out of alignment; over-torquing crushes wheel bearing spacer tubes.
Chassis & SuspensionMedium Strength (Blue 242/243)

Rear Shock Upper & Lower Mount Bolts

Tightening Torque
44 N·m
32.5 ft-lb
Thread Dimension
M10 × 1.25
Socket / Drive
14 mm / 17 mm Socket
Sequence: Torque bolts with rear suspension loaded at static ride height (wheel on ground), not at full hanging droop.
CRITICAL CAUTION: Torquing shock eyelet rubber/spherical bushings at full droop locks preload twist into bushings, causing premature bushing tear.
Chassis & SuspensionNone (Clean Dry)

Swingarm Pivot Shaft Nut

Tightening Torque
100 N·m
73.8 ft-lb
Thread Dimension
M18 × 1.5
Socket / Drive
22 mm / 27 mm Socket
Sequence: Set swingarm pivot thrust collar clearance with spanner tool before torquing central through-shaft nut.
CRITICAL CAUTION: Incorrect pivot preload crushes needle bearings or induces lateral swingarm wobble and high-speed tank-slappers.
Cockpit & SteeringNone (Clean Dry)

Upper Triple Clamp (Fork Bridge) Pinch Bolts

Tightening Torque
26 N·m
19.2 ft-lb
Thread Dimension
M8 × 1.25
Socket / Drive
6 mm Allen / 12 mm Socket
Sequence: Verify fork tube height / stanchion protrusion above top bridge matches factory spec with vernier caliper before tightening.
CRITICAL CAUTION: Uneven fork tube heights alter chassis steering geometry, trail, and induce high-speed head-shake.
Cockpit & SteeringNone (Clean Dry)

Lower Triple Clamp Pinch Bolts

Tightening Torque
23 N·m
17 ft-lb
Thread Dimension
M8 × 1.25
Socket / Drive
6 mm Allen / 12 mm Socket
Sequence: Alternate between upper and lower bolt on each side 3 times to achieve uniform clamping without localized tube deformation.
CRITICAL CAUTION: CRITICAL: Overtightening lower clamp pinches the outer fork slider oval, locking fork bushings and causing severe suspension stiction.
Cockpit & SteeringNone (Clean Dry)

Handlebar Riser Clamps / Clip-on Clamps

Tightening Torque
24 N·m
17.7 ft-lb
Thread Dimension
M8 × 1.25
Socket / Drive
6 mm Allen Socket
Sequence: MANDATORY ZERO-GAP RULE: Tighten front bolts until clamp casting touches bottom casting with zero gap; then torque rear bolts to spec.
CRITICAL CAUTION: Leaving a gap at the front bolts allows handlebars to slip under sudden hard emergency braking.
Cockpit & SteeringNone (Clean Dry)

Steering Stem Head Nut

Tightening Torque
110 N·m
81.1 ft-lb
Thread Dimension
M28 × 1.0
Socket / Drive
30 mm / 36 mm Socket
Sequence: Ensure upper triple clamp pinch bolts are loose when torquing stem nut to prevent binding the steering bearings.
CRITICAL CAUTION: This nut clamps the top bridge; steering head bearing preload is adjusted separately via the lower castle spanner ring.
Cockpit & SteeringNone (Clean Dry)

Front Brake Master Cylinder Clamp Bolts

Tightening Torque
10 N·m
89 in-lb
Thread Dimension
M6 × 1.0
Socket / Drive
8 mm Hex / 5 mm Allen
Sequence: Align "UP" arrow mark on split clamp upward. Tighten upper bolt first until clamp seats flush; then torque lower bolt to 10 N·m.
CRITICAL CAUTION: Tightening bottom bolt first pinches the reservoir casting unevenly, cracking master cylinder clamp ears.
Brakes & HydraulicsMedium Strength (Blue 242/243) / Factory Micro-Encapsulated

Front Brake Caliper Mount Bolts

Tightening Torque
38 N·m
28 ft-lb
Thread Dimension
Radial M10 × 1.25
Socket / Drive
12 mm / 14 mm Socket (T50 Torx on BMW)
Sequence: Radial calipers: tighten upper and lower bolts in two equal stages (20 N·m, then final spec).
CRITICAL CAUTION: Radial caliper mounting threads tap directly into aluminum fork bottoms. Never use pneumatic/electric impact guns.
Brakes & HydraulicsMedium Strength (Blue 242/243)

Rear Brake Caliper Mount / Bracket Bolts

Tightening Torque
23 N·m
17 ft-lb
Thread Dimension
M8 × 1.25
Socket / Drive
12 mm Socket / 6 mm Allen
Sequence: Ensure caliper bracket sliding torque arm slot engages swingarm tab cleanly before tightening.
CRITICAL CAUTION: Unengaged bracket tabs allow rear caliper to rotate with disc during braking, shearing brake lines.
Brakes & HydraulicsMedium Strength (Blue 242/243 Mandatory)

Front Brake Disc Rotor Bolts

Tightening Torque
18 N·m
13.3 ft-lb
Thread Dimension
M8 × 1.25 Low-Profile Shoulder
Socket / Drive
6 mm Allen / T40 Torx
Sequence: Clean wheel hub female threads with solvent; apply 2 drops of Blue 243. Tighten in criss-cross star pattern across 2 stages.
CRITICAL CAUTION: A loose brake rotor bolt can back out and impact the front fork leg, instantly locking the front wheel.
Brakes & HydraulicsMedium Strength (Blue 242/243 Mandatory)

Rear Brake Disc Rotor Bolts

Tightening Torque
23 N·m
17 ft-lb
Thread Dimension
M8 × 1.25 / M10 × 1.25
Socket / Drive
6 mm Allen / T40 Torx
Sequence: Criss-cross star pattern. Ensure disc sits 100% flat against wheel hub register with zero trapped debris.
CRITICAL CAUTION: Trapped dirt under rotor mounting flange causes severe brake pedal pulsation and lateral rotor runout.
Brakes & HydraulicsNone (Clean Dry with Fresh Copper Washers)

Hydraulic Brake Line Banjo Bolts

Tightening Torque
30 N·m
22.1 ft-lb
Thread Dimension
M10 × 1.25 (Brembo: M10 × 1.0)
Socket / Drive
12 mm / 14 mm Hex Socket
Sequence: Always replace the two copper/aluminum crush washers per banjo joint. Never reuse crushed washers.
CRITICAL CAUTION: Over-torquing shears the cross-drilled fluid passage inside the banjo bolt, destroying the caliper casting.
Brakes & HydraulicsNone (Clean Dry)

Caliper Hydraulic Bleed Screws

Tightening Torque
6 N·m
53 in-lb
Thread Dimension
M7 × 1.0 / M8 × 1.25
Socket / Drive
8 mm / 10 mm Line Wrench
Sequence: Use 6-point flare-nut / line wrench to prevent rounding soft hex. Snug firmly until seated against conical seat.
CRITICAL CAUTION: Overtightening distorts the internal conical sealing point, causing persistent hydraulic fluid weeping.
Four Essential Workshop Tightening Protocols
1. Lower Triple Clamp Stiction Rule
Lower triple clamp pinch bolts must NEVER be torqued past factory spec (18–23 N·m). Overtightening pinches the outer fork slider oval, crushing internal bushings against the chrome stanchion and causing severe suspension stiction and premature seal failure.
2. Handlebar Clamp Zero-Gap Rule
Always tighten the front two clamp bolts until the upper clamp touches the bottom riser with ZERO clearance. Then torque the rear two bolts to spec. Leaving an equal gap front and rear allows handlebars to slip forward under sudden emergency braking.
3. Front Axle Bounce & Alignment
Torque front axle spindle nut first while pinch bolts are loose. Pump front forks up and down vigorously 3–4 times with front brake applied. This allows the right fork bottom to center itself freely along the axle spindle before torquing pinch bolts.
4. Star Pattern & Criss-Cross Torque
Always torque opposed bolts across a circular pattern in 2 progressive stages (50% torque stage 1, 100% final stage). Essential on brake disc rotors, engine case covers, and clutch pressure plates to prevent warping aluminum mating faces.
Metric Bolt Strength Grade & Tensile Markings Guide
Grade 8.8
Standard High Tensile (800 MPa)
Yield strength: 640 MPa. Used on footpeg brackets, fairing subframes, radiator brackets, and standard chassis mounts. Head stamped "8.8".
Grade 10.9
Extra High Tensile (1,040 MPa)
Yield strength: 940 MPa. Mandatory on front/rear brake caliper mounts, suspension linkages, and engine hanger bolts. Head stamped "10.9".
Grade 12.9
Ultra High Tensile (1,220 MPa)
Yield strength: 1,100 MPa. Extreme strength alloy steel used on cylinder head studs, crankcase through-bolts, and countershaft sprocket studs. Head stamped "12.9".
Stainless A2-70 / A4-80
Galling Hazard in Aluminum
Stainless steel galls into aluminum engine cases, seizing permanently. Never replace structural chassis or brake bolts with cosmetic hardware store stainless.
Browse Calibrated Torque Wrenches (1/4", 3/8", 1/2")Shop Threadlockers & Primer CleanersShop Metric Hex & Torx Sockets

3-Phase Charging System & Battery Diagnostic Flowchart

Yuasa & OEM Standards
Multimeter troubleshooting protocols, cold cranking amps (CCA) ratings, 3-phase stator AC outputs, and regulator-rectifier health verification.
Shop YTX9-BS Batteries
OEM Battery Code
YTX9-BS (VRLA / AGM Maintenance-Free)
Cold Cranking Rating
135 CCA
Capacity (10HR Rate)
8 Ah (12V)
Regulated Output Spec
14.3 - 14.8 V DC
Key-OFF Parasitic Limit
< 1.5 mA (CAN-bus sleeping state)
V DC
Multimeter Test Diagnosis
Enter your multimeter terminal reading on the left to view instant diagnostic interpretations and recommended workshop actions.
OEM Factory AGM BatteryExact OEM Fit
Yuasa YTX9-BS High Performance AGM Battery
Dimensions: 150 L × 87 W × 105 H mm • Weight: 6.6 lbs (3.0 kg). Pre-filled absorbed glass mat technology engineered for heavy vibration resistance.
Lithium LiFePO4 UpgradeUp to 70% Lighter
Antigravity ATX-12 Re-Start (360 CCA / 2.0 lbs)
Features built-in RE-START jump starting reserve. Never stranded by dead lights: press the restart button on the top terminal to crank the motorcycle without jumper cables.
Smart Maintainer SpecBattery Life Extension
12V AGM / Float 1.0A
Standard Charge Rate: 0.9A (Max 1.8A). Automated desulfation & float maintenance ensures full capacity retention during off-season winter storage.
Recommended Parts: Yuasa YTX9-BS High Performance AGM BatteryOptiMate 4 Quad Program 1.0A Smart Battery Tender / Charger
CIRCUIT HEALTH DECKMain: 40A MaxiSpec: < 1.5 mA Quiescent

FUSE BOX, RELAY ASSIGNMENTS & PARASITIC DRAIN ISOLATOR

Fuse & Relay Location: Main fuse box located under rider seat forward of battery; Master 40A fuse near starter solenoid.
Select Fuse to Inspect Circuits & Failure SymptomsFormat: Mini Blade (ATM)
10A
SLOT: IGNITION

DME Engine Control

Rating: 10 Amps
Downstream Protected Components:
DME LogicIgnition Coils
Mechanic Diagnostic: Symptoms If Blown
Engine will crank but fails to fire.
Shop Replacement 10A Fuses

Suspension Hydraulics, Fork Fluids & Interactive Sag Tuner

Showa • KYB • WP Standards
OEM hydraulic capacities, air-gap measurement standards, clicker baselines, and mathematical rider sag tuning.
Shop 46mm Fork Seals
Fork Architecture
Inverted USD Cartridge (46mm Marzocchi / Sachs DDC)
Oil Volume Per Leg
520 ml (17.6 US fl oz) per leg
OEM Fluid Specification
BMW Type 2 Fork Oil (SAE 5W)
Air-Gap Spec (Oil Level)
110 mm (4.33 in) compressed, spring removed
Fork Seal Dimensions
46 x 58 x 10.5 mm
Total Suspension Travel
Front: 120 mm • Rear: 120 mm
Target Rider Sag: 32 - 36 mm (27 - 30% of 120 mm travel)
Front Preload Baseline
5 turns in from full soft
Rebound Damping Baseline
Electronic DDC Dynamic Damping Control
Compression Damping Baseline
Electronic DDC Dynamic Damping Control
Target Free Sag (Unladen)
20 - 25 mm
Enter 3-Point Sag Measurements (mm)
Suspension Sag Diagnosis & Geometry Status
Enter your extended, static, and rider measurements on the left (or select a preset) to compute exact sag percentages and spring preload recommendations.
Factory Fluid StandardDirect Spec
Maxima Racing Fork Fluid 5W (1 Liter)
Formulated with anti-foam agents and shear-stable viscosity index improvers to prevent damping fade under aggressive riding heat.
Fork & Dust Seal KitExact Stanchion Fit
All Balls Racing 46mm Fork & Dust Seal Kit
Features directional triple-lip rubber seal profile and external garter springs engineered to withstand heavy stanchion flex without weeping.
Air-Gap Tuning PhysicsBottoming Control
110 mm (4.33 in) compressed, spring removed
Trapped air column acts as a progressive spring in final 30% of stroke. Adding +5mm oil increases bottoming resistance without stiffening small bump compliance.
Recommended Maintenance Parts: Maxima Racing Fork Fluid 5W (1 Liter)All Balls Racing 46mm Fork & Dust Seal Kit

BRAKING SYSTEM HYDRAULICS, WEAR LIMITS & CALIPER REBUILD MATRIX

Rotor Discard Limits (Tmin) • Caliper Piston Architecture • Pad Compounds • Hydraulic Bleed Specs

FACTORY CERTIFIED SPECIFICATIONS
Front Rotor Discs
320 mm × 5 mm
Discard Limit: 4.5 mm Tmin
Rear Rotor Disc
220 mm × 5 mm
Discard Limit: 4.5 mm Tmin
Caliper Architecture
Brembo 4-Piston Radial Monobloc
Rear: Brembo 1-Piston Floating Pin-Slide
Hydraulic Fluid Standard
DOT 4 Synthetic Glycol
Dry BP ≥ 260°C • Wet BP ≥ 165°C
Caliper Bolt Torques (NM)
Mount: 38 N·m
Banjo: 24 N·m • Bleed: 6 N·m
Friction Material Lining
Sintered Metallic HH-Rated
Discard Pad at ≤ 1 mm
DIGITAL MICROMETER ROTOR WEAR DIAGNOSTIC GAUGE
Measure rotor friction ring with a pointed blade micrometer to verify safe thermal mass and discard limits
Enter Measured Disc Thickness (mm)
mm
Nominal New: 5.00 mm • Stamped Discard: 4.50 mm Tmin
Quick Benchmark Simulation Presets
Enter your micrometer rotor reading above or click a simulation preset to calculate remaining disc service life and discard safety status.
BRAKE PAD FRICTION COMPOUND & METALLURGY MATRIX
Compare OEM sintered metallic, organic carbon-ceramic, and racing compound friction dynamics
Compound Architecture
Double-H (HH) Sintered Metallic Compound
OEM FACTORY STANDARD
Friction Rating & Thermal Operating Envelope
HH Rated (μ ≥ 0.55 across cold and hot temperature zones)
0°C – 650°C (32°F – 1,200°F) • Exceptional High-Temp Fade Resistance
Lever Modulation & Initial Cold Bite
Sharp, aggressive initial bite with linear lever feel and minimal thermal hysteresis under repeated heavy slowdowns.
Rotor Wear Index & Wet Weather Recovery
Moderate to high rotor abrasive index. Requires hardened stainless steel rotors; not compatible with cast iron discs.Superior wet recovery. Metallic sintered composition cuts cleanly through surface water film without delaying pad response.
Application & Recommended Riding Profile
Recommended for modern high-performance street motorcycles, spirited canyon riding, two-up touring, and occasional trackdays.
Hydraulic Fluid Bleeding & Caliper Overhaul Protocol
Hygroscopic Moisture Curve
Glycol brake fluid absorbs 2%–3% atmospheric water annually. Over 24 months, boiling point collapses from 260°C (500°F) to below 165°C (329°F), risking sudden vapor-lock brake loss. Flush fluid every 2 years.
Piston Seal Rollback Function
Caliper square-profile rubber seals flex under pressure to retract pistons ~0.15 mm when pressure drops. Hardened or dirty seals prevent rollback, causing continuous pad drag, glazed rotors, and fuel mileage loss.
Bleeder Torque & Sequence
Bleed master cylinder first, then furthest caliper, then nearest caliper. Tighten bleeder nipples to strictly 6 N·m. Over-tightening permanently shears threads in aluminum calipers.
Direct-Fit Braking Components & Hydraulic Fluids
Authentic double-H sintered pads, replacement floating rotors, and high-temp racing brake fluid

IGNITION ENGINEERING, HEAT-RANGES & COMBUSTION DIAGNOSTICS

OEM Spark Plugs • Heat-Range Dissipation • Coil Resistance • Visual Combustion Reading Matrix

FACTORY CERTIFIED SPECIFICATIONS
Factory Standard Plug
NGK LMAR9D-J
4 Plugs (1 Per Cylinder)
Electrode Spark Gap
0.8 - 0.9 mm (0.031 - 0.035 in)
M10 x 1.026.5 mm Reach
Hex Drive & Socket Spec
14 mm Bi-Hex (Thin-Wall)
Use magnetic rubber-insert thin socket
Tightening Torque (NM)
12 N·m
1/2 turn after finger seat (gasket crush)
Stick Coil Resistances
Pri: 0.75 - 1.05 Ω at 20°C
Sec: 9.8 - 12.8 kΩ at 20°C
Service & Replacement
Inspect: 9,000 miles (15,000 km)
Replace: 18,000 miles (30,000 km)
SPARK PLUG HEAT-RANGE & METALLURGY SELECTOR
Compare OEM standard, fine-wire precious metals, and ambient/duty cycle thermal dissipation paths
Verified Part Specification
NGK LMAR9D-J
FACTORY SPECIFICATION
Metallurgy & Center Tip Architecture
Copper Core / Solid Nickel Alloy Ground Electrode
Thermal Dissipation Path & Physics
Standard OEM factory thermal dissipation rate. Calibrated to stabilize ceramic nose temperature between 500°C–800°C across mixed street, highway, and mountain riding.
Operating Application Envelope
Stock engines, factory ECU mapping, general commuting, and standard touring. Recommended for all baseline maintenance schedules.
Ignitability & Coil Voltage Demand
Standard spark kernel size. Standard secondary coil demand (~15–20 kV). Solid copper core ensures rapid heat conduction away from tip.
SPARK PLUG READING & COMBUSTION DIAGNOSTICS ANALYZER
Interactive visual diagnosis: Match your ceramic insulator tip and electrodes to detect AFR, timing, oil intrusion, and thermal overload
Normal Clean — Optimal Combustion Equilibrium
OPTIMAL COMBUSTION
Thermal Operating Range: 500°C – 800°C (932°F – 1,472°F) • Self-Cleaning Pyrolysis Window
Visual Insulator & Electrode Profile
Ceramic insulator nose is light grayish-tan, beige, or light brown. Firing tip and electrodes are dry with minimal combustion deposits. Ground electrode edges remain crisp without rounding or erosion.
Multimeter Electrical Resistance Test
Insulation Resistance > 10 MΩ (Infinite DC resistance between center terminal and steel shell). Dielectric barrier is pristine; zero spark leakage to cylinder head ground.
Probable Root Causes
  • Optimal air/fuel ratio across all throttle positions (stoichiometric 14.7:1 cruise, 12.8:1–13.2:1 power enrichment)
  • Correct spark plug heat range precisely matched to engine displacement and cooling efficiency
  • Ignition timing and coil dwell saturation within factory parameters
  • Healthy piston rings and valve guide seals with minimal oil blow-by
Prescribed Workshop Remediation Action
No mechanical intervention required. Inspect gap with wire-style feeler gauge and reinstall to factory torque specification.
Coil-on-Plug (COP) / Stick Coil Multimeter Bench Testing Protocol
Step 1 • Primary Circuit
Set DMM to lowest Ω range. Probe between Terminal 1 (+12V switched) and Terminal 2 (ECU trigger pin). Normal reading: 0.75 - 1.05 Ω at 20°C at 20°C.
Step 2 • Secondary Circuit
Set DMM to kΩ range. Probe between Terminal 1 and the high-voltage spark plug spring terminal inside the boot. Factory spec: 9.8 - 12.8 kΩ at 20°C at 20°C.
Step 3 • Dielectric Boot Inspection
Flex silicone boot under bright light. Check for pinholes, white powdery dielectric breakdown tracks, or hardened silicone causing high-voltage flashover to the cylinder head spark plug tube.
Direct-Fit Ignition Components & Workshop Sockets
Authentic laser iridium plugs, thin-wall magnetic sockets, and OEM replacement stick coils

BMW Diagnostic Fault Codes & Multimeter Bench Testing

FI & OBD2 Decoder
Authentic factory ECU fault codes, sensor resistance specifications, and harness pinout troubleshooting.
Launch Full BMW DTC Engine
Code P0105Manifold Absolute Pressure (MAP)
MAP sensor electrical circuit malfunction / range error.
Test: Verify 5.0V VRef and 2.5-3.0V signal key-on engine-off.
Code P0115Engine Coolant Temp (ECT)
ECT sensor circuit open, short, or out of plausible range.
Test: Measure NTC thermistor: ~2.5 kΩ at 20°C, 300 Ω at 80°C.
Code P0335Crankshaft Position Sensor (CKP)
CKP sensor electrical circuit or missing pulse teeth.
Test: Measure VR magnetic pickup coil resistance (typically 200-600 Ω).
Looking for other error codes, sensor pinouts, or OBD2/Euro 5 codes?

Official NHTSA Safety Recalls & Technical Bulletins

2 Active Campaigns
U.S. Department of Transportation compliance database (Title 49 U.S.C. Chapter 301).
Verify VIN on NHTSA.gov
The U.S. National Highway Traffic Safety Administration reports 2 safety recall campaigns associated with this platform. Independent repair shops and riders should confirm that authorized dealership warranty remedies have been applied.
NHTSA #16V948000SUSPENSION:REAR
Received: 30/12/2016
Defect Description

BMW North America, LLC (BMW) is recalling certain model year 2016-2017 S 1000 RR motorcycles manufactured June 8, 2016, to November 16, 2016, and 2017 S 1000 R motorcycles manufactured on October 12, 2016. One of the bolts on the rear suspension deflection lever may loosen and adversely affect the handling of the motorcycle.

Safety Hazard / Consequence

If the bolt loosens and affects the motorcycle's handling, there may be an increased risk of a crash.

Factory Remedy & Repair Action

BMW will notify owners, and dealers will replace the bolts and tighten them to the proper specifications, free of charge. The recall began February 17, 2017. Owners may contact BMW customer service at 1-800-525-7417.

Manufacturer Notes: Owners may also contact the National Highway Traffic Safety Administration Vehicle Safety Hotline at 1-888-327-4236 (TTY 1-800-424-9153), or go to www.safercar.gov.
NHTSA #21V060000FUEL SYSTEM, GASOLINE:DELIVERY:FUEL PUMP
Received: 08/02/2021
Factory Service Schedule

Scheduled Maintenance Punch-List & Service Estimator

Select a factory interval milestone or enter your current odometer reading to preview scheduled workshop tasks for the 2020 BMW S 1000 R.

ODOMETER:MILES
FACTORY INTERVALS:
Workshop Tablet Punch-List Progress0 of 9 Tasks Signed Off (0%)
Fluids & Engine
INSPECT / OK0.8 HR BOOK

Engine Oil & Filter Element Replacement

3.50 L (3.70 US qt) (5W-40)
  • Drain Plug Torque: 43 N·m (31.7 ft-lb)
  • Always install a fresh OEM aluminum crush washer (M12/M14)
  • Pre-lube new filter O-ring with fresh engine oil prior to spin-on install
  • Warm engine to operating temperature before draining for complete sediment evacuation
TOOLS: 8mm / 10mm Hex Bit Socket + 65mm 14-Flute Filter Cup
PARTS/FLUIDS: 5W-40 Full Synthetic 4T Oil + Filter + Crush Washer
Ignition & Air
INSPECT / OK1.2 HR BOOK

Spark Plug Inspection / Direct-Replacement

NGK LMAR9D-J (Gap: 0.8 mm)
  • Tightening Torque: 13 N·m (9.6 ft-lb)
  • Hand-thread plug completely down to cylinder head seat before applying torque wrench
  • Inspect electrode coloration for stoichiometric AFR balance (tan/light grey)
  • Apply thin film of dielectric grease to interior of coil-on-plug boots
TOOLS: 14mm / 16mm Thin-Wall Spark Plug Socket + Feeler Gauge
PARTS/FLUIDS: NGK LMAR9D-J + Dielectric Silicone Grease
Hydraulics & Brakes
INSPECT / OK1 HR BOOK

Brake Fluid Full Hydraulic Flush & De-Aeration

DOT 4 Flush (Front Dual + Rear)
  • Bleeder Nipple Torque: 6 N·m (Do not over-torque aluminum threads)
  • Hygroscopic degradation: brake fluid absorbs atmospheric moisture; discard if moisture > 3.7%
  • Flush master cylinder reservoir completely before cycling ABS hydraulic modulator
  • Wash painted/plastic bodywork immediately with clean water if fluid contact occurs
TOOLS: 8mm / 10mm Bleeder Box Wrench + Clear Bleeder Hose + Catch Bottle
PARTS/FLUIDS: DOT 4 High-Performance Glycol Ether Brake Fluid + Isopropyl Alcohol
Hydraulics & Brakes
DUE NOW0.4 HR BOOK

Rotor Thickness & Pad Friction Lining Inspection

Front Min: 4.5 mm | Rear Min: 4.5 mm
  • Front Caliper Mounting Torque: 38 N·m
  • Minimum friction material thickness: 1.0 mm (excluding steel backing plate)
  • Check rotor surface for deep grooving, heat bluing, or radial thermal stress cracks
  • Verify caliper slide pins are free of corrosion and lubricated with silicone grease
TOOLS: Digital Micrometer (0-25mm) + Vernier Caliper + Torx T50 / 12mm Socket
PARTS/FLUIDS: Brake Contact Degreaser + High-Temp Synthetic Caliper Pin Grease
Drivetrain
DUE NOW0.4 HR BOOK

Drive Chain Slack Inspection, Adjustment & Lube

Chain Slack: 20 - 30 mm (on side stand)
  • Clean chain with O-ring safe chain degreaser; do not use harsh solvents or wire brushes
  • Measure chain slack at midpoint of lower run; adjust to 20-30 mm tolerance
  • Torque rear axle spindle nut: 150 N·m
  • Apply synthetic high-adhesion chain wax/lube to interior run of rollers
TOOLS: Rear Axle Socket (27mm/32mm) + Alignment Gauge + Torque Wrench
PARTS/FLUIDS: O-Ring Safe Chain Degreaser + Synthetic Chain Lube
Ignition & Air
INSPECT / OK0.5 HR BOOK

Engine Air Intake Filter Element Service

OEM High-Efficiency Paper Element / Multi-Layer Cotton
  • Remove fuel tank / side fairing panels to access airbox cover screws
  • Inspect airbox lower cavity and drain hose for blowby oil condensation
  • Do not blow compressed air through viscous paper filter elements (destroys filtration matrix)
  • Verify airbox lid seal is properly seated to prevent unfiltered dust bypass
TOOLS: 4mm / 5mm Hex Allen Wrenches + JIS #2 Screwdriver
PARTS/FLUIDS: Replacement OEM Air Filter Element + Clean Microfiber Cloth
Fluids & Engine
INSPECT / OK1 HR BOOK

Engine Cooling System Flush & Radiator De-Aeration

Silicate & Borate-Free HOAT 50:50 Premix (-37°C / -35°F)
  • Only open radiator cap when engine is completely cold (ambient temperature)
  • Drain coolant from water pump drain bolt and radiator lower hose connection
  • Flush cooling circuit with distilled water before filling with fresh 50:50 HOAT coolant
  • Cycle engine until radiator fan activates, then burp cooling jacket to eliminate air pockets
TOOLS: 8mm / 10mm Drain Bolt Socket + Catch Pan + Radiator Cap Tester
PARTS/FLUIDS: Silicate-Free Long-Life Motorcycle Coolant (50:50 Distilled Water Premix)
Valvetrain
INSPECT / OK3.8 HR BOOK

Valve Clearance Inspection & Camshaft Timing Audit

Intake: 0.12 - 0.20 mm | Exhaust: 0.22 - 0.30 mm
  • Strict requirement: engine must be cold (temperature <= 35°C / 95°F) for accurate readings
  • Rotate crankshaft to compression Top Dead Center (TDC) for each cylinder firing order
  • Shim Diameter: 9.48 mm
  • Replace valve cover gasket and spark plug well O-rings upon reassembly
TOOLS: Angled Blade Feeler Gauges (0.04-0.35mm) + Digital Micrometer + Magnet Pen
PARTS/FLUIDS: Valve Shim Assortment Kit + OEM Valve Cover Gasket + ThreeBond Liquid Gasket
Chassis & Safety
DUE NOW0.5 HR BOOK

Chassis, Axle & Safety Critical Fastener Audit

Front Axle: 91 N·m | Rear Axle: 150 N·m
  • Front Axle Pinch Bolts: 23 N·m (Tighten alternately twice)
  • Front Caliper Mounting Bolts: 38 N·m
  • Check triple clamp pinch bolts, handlebar clamps, and footpeg brackets
  • Inspect steering head bearings for notchiness or play at center-detent
TOOLS: Calibrated 3/8" & 1/2" Click-Type Torque Wrenches + Metric Sockets
PARTS/FLUIDS: Blue Medium-Strength Threadlocker (Loctite 243)
Tool Pre-Flight

Workshop Tool & Chemical Pre-Flight Card

Calibrated Instruments & Drive Specifications
Sockets, Hex Bits & Wrenches
8mm / 10mm Hex Bit Socket
Engine oil drain plug removal & torquing
65mm 14-Flute Oil Filter Cup Wrench
Spin-on oil filter removal & install (3/8" drive)
14mm / 16mm Thin-Wall Spark Plug Socket
Spark plug removal & installation
Torx T50 Socket
Brake caliper mounting bolts
8mm / 10mm Bleeder Box Wrench
Hydraulic caliper bleed nipple opening
Front & Rear Axle Sockets (19mm - 32mm)
Wheel axle spindle nuts & chain adjustment
Calibrated Precision Instruments
1/4" Drive Torque Wrench (5 - 25 N·m)
Bleed valves, spark plugs, casing screws
1/2" Drive Torque Wrench (30 - 160 N·m)
Axle nuts, caliper bolts, drain plugs
Angled Blade Feeler Gauge Set (0.04 - 0.35 mm)
Valve clearances & spark plug electrode gap
Digital Rotor Micrometer (0 - 25 mm)
Brake disc minimum discard thickness verification
Workshop Chemicals & Consumables
Blue Medium Threadlocker (Loctite 243)
Brake caliper, rotor, and footpeg fasteners
High-Temp Anti-Seize Paste
Spark plug threads & axle spindle coating
DOT 4 Synthetic Brake Fluid
Hydraulic brake & clutch system flushing
Synthetic O-Ring Chain Degreaser & Lube
Drive chain cleaning & roller lubrication
New OEM Aluminum Crush Washers (M12 / M14)
Oil drain plug sealing (single-use)

Dealership Flat-Rate Labor vs. DIY Workshop Cost Estimator

Compare authorized dealership retail service invoicing against performing scheduled maintenance in your private shop.

DEALER LABOR RATE:$150/hr
Estimated Dealership Retail Invoice
Flat-Rate Labor (1.3 hrs @ $150/hr):$195.00
OEM Fluids & Parts (35% Dealer Markup):$61.00
Shop Supplies & Waste Disposal Fee:$25.00
Dealership Quote Subtotal:$281.00
DIY Private Workshop Investment
Factory Fluids & Replacement Filters:$45.00
Workshop Mechanical Labor:$0.00 (Owner Performed)
Environmental Disposal Fee:$0.00 (Free Auto Recycling)
Total DIY Investment:$45.00
You Save $236.00 (84%) by Servicing in Your Workshop
Includes matched OEM fluid capacities, filter, and authentic factory torque specifications.
1-Click Factory Service KitOEM Spec Fluid Capacities Matched

Workshop Maintenance Kit & Factory Fluids

Authentic factory-grade motor oil, oil filter, and high-temp brake fluid matched precisely to 2020 BMW S 1000 R capacities.
Full Kit Subtotal
$65.34
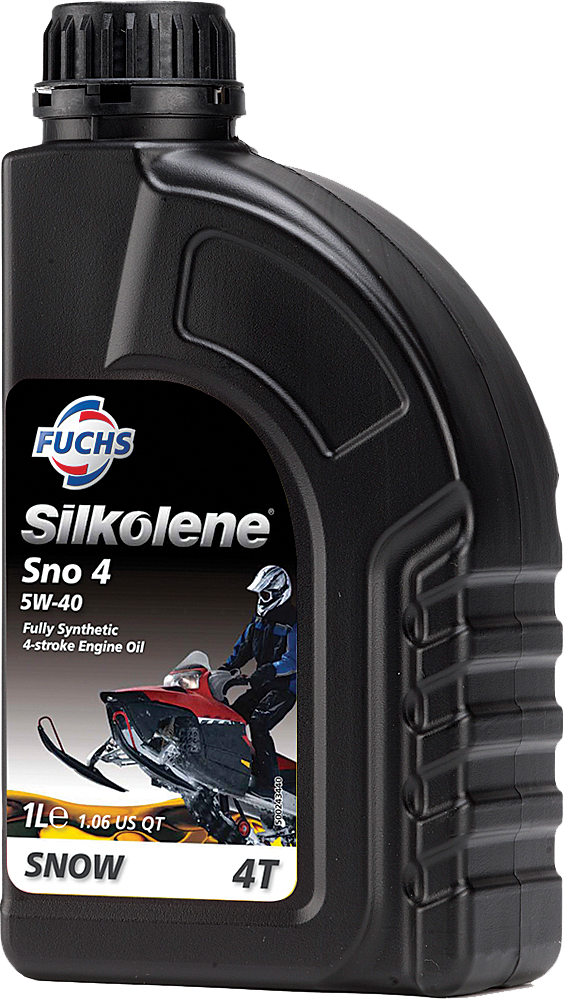
Silkolene Snow 4T Engine Oil 5W-40 (1 Liter)
5W-40 Full Synthetic 4T

Silkolene Snow 4T Engine Oil 5W-40 (1 Liter)

1-Liter Bottles (x4 Included)
Matches factory 5W-40 spec (Oil spec: 3.50 L (3.70 US qt))
Item Price
$47.80($11.95 ea)
K&N Premium High-Flow Oil Filter
Synthetic Media High-Flow

K&N Premium High-Flow Oil Filter

1 Heavy-Duty Filter Unit
Premium OEM-spec replacement with 17mm hex nut
Item Price
$11.99
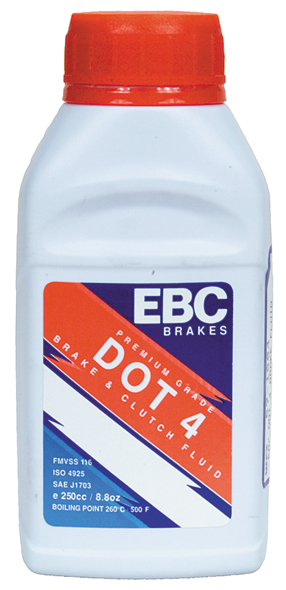
EBC High-Performance DOT 4 Synthetic Brake Fluid
DOT 4 Synthetic Formula

EBC High-Performance DOT 4 Synthetic Brake Fluid

8.8 oz (250 ml) Workshop Bottle
Meets & exceeds factory DOT 4 specifications
Item Price
$5.55
Factory OEM Spark Plug Spec

NGK LMAR9D-J

Gap: 0.8 mm (0.031 in)
Inspection milestone: 18,000 miles (30,000 km). Exact factory part specification.
Authentic OEM Reference
Search OEM Plugs →
Complete Workshop Maintenance Package3 Essential Service Items
Includes 5W-40 Full Synthetic 4T engine oil (1-Liter Bottles (x4 Included)), high-flow filter & DOT 4 fluid.
Kit Total
$65.34

Looking for direct-fit parts for this 2020 S 1000 R?

Browse authentic verified parts, motor oils, filters, brake pads, and tires that fit this exact bike.

Browse Direct-Fit Parts
2020 BMW S 1000 R Factory Workshop Specs & Maintenance Guide | WowShopper | WowShopper Motorsports